![]()
Community Groups
Important: Membership User Groups and Community Groups are different concepts. Membership User Groups allow an administrator to create a group of membership users, thereby reducing the effort required to assign identical permissions to many users. See Membership User Groups. Community Groups are explained below.
Community groups are another aspect of a community sites. Being a part of a group allows members to meet people with similar interests, for example, car racing.
Groups have features and functions similar to users. A community group can have a Message Board, Discussion Board, maintain a membership list, and keep a group journal. You can manage community groups from the Web site or the Workarea.
You can assign a taxonomy category to community groups. This lets users browse and search for groups by category.
In addition, you can assign Tags to a community group. This allows users to find the group when searching by tag name.
This section also contains the following topics.
Community Groups in the Workarea
Allowing Community Group Members to Work with Folders
Viewing a Community Group’s Details
Editing a Community Group’s Information
Assigning Tags to a Community Group
Viewing Members of a Community Group
Adding Members to a Community Group
Accepting/Declining Requests to Join a Community Group
Removing Members from a Community Group
Searching for a Community Group
Community Groups in the Workarea
You can access community group information in the following areas of the Workarea:
My Workspace > Community Groups - displays groups to which you belong; also lets you remove yourself from them.
Workarea > Settings > Community Management > Community Groups - displays all groups. You can define a group’s details or add and remove members from the group when you are:
- a Group’s Leader (Group’s Administrator)
- a Ektron CMS400.NET Administrator
- a Ektron CMS400.NET User or Membership user with the Community Group Admin or Community Group Create role
Managing Community Groups
To view a list of all community groups in the Workarea, click the Settings > Community Management > Community Groups. From this screen, the following actions and information are available.
Information
- Group name
- Number of members
- Language
- ID
- Whether membership is open to the public or restricted
- Short description
- Location
Actions
- Viewing a Community Group’s Details
- Editing a Community Group’s Information
- Assigning Tags to a Community Group
- Viewing Members of a Community Group
- Adding Members to a Community Group
- Accepting/Declining Requests to Join a Community Group
- Removing Members from a Community Group
- Searching for a Community Group
- - Community Group Server Controls
Adding a Community Group
Administrators or Ektron CMS400.NET users with the Community Group Administrator role can add a new community group in the Workarea. After you create a group, you can add members to it. See Also: Adding Members to a Community Group and Community Groups
Note: The CommunityGroupBrowser server control also has a Create Group link, which lets you create a community group from the Web site. See Also: CommunityGroupBrowser Server Control
To add a new community group, follow these steps.
1. Click Settings > Community Management > Community Groups.
2. Click Add New Community Group ( ).
).
3. The Add Community Group screen appears.
4. Use the table below to complete the screen.
|
Field |
Description |
|
Properties Tab |
|
|
Group Name |
The name of the group. |
|
A group administrator has privileges to delete a group or edit its properties. Note: Members of the Administrators group and users assigned to the Community Group Admin role also have these privileges. By default, the person who created the group is the group administrator. Click Browse to change the administrator. |
|
|
Membership |
Select whether the group is Open - anyone can join Restricted - only invited members can join See Also: Accepting/Declining Requests to Join a Community Group Note that restricted groups can be found in the same way that appear with open groups can. Also, their activities are published as notifications. For example, Tom posted a reply to the forum topic titled 'RoboTech Acquisition'. So, do not create a group or publish activities that you want to keep secret. |
| Features: Create Group Calendar | Click inside this circle if you want to allow the group administrator to create a group calendar. See Also: Creating a Calendar in My Group |
| Features: Create Group Forum | Click inside this circle if you want to allow the group administrator to create a group forum. See Also: Using Discussion Boards in Community Groups |
|
Upload an image to use as an avatar for the group. Here is an example of how a group image is used.
|
|
|
Location |
The geographical location of the group. |
|
Short Description |
A brief description of the group. |
|
Description |
A fully detailed description of the group. |
|
Enable Distribute |
Check this box if you want the group and system administrator to be able to distribute content to any Ektron CMS400.NET folder. See Also: Distributing Content to Another Ektron CMS400.NET Folder |
|
Allow member to manage photo/workspace folders |
Checking this box allows members to add, remove and control the sharing of folders in a community group’s Photo Gallery or Document’s Workspace. See Also: Allowing Community Group Members to Work with Folders. |
| Group MessageBoard Moderation | Check this box if you want this Message Board to be moderated. That is, comments and replies must be approved by an authorized user before they appear. See Also: Moderating a Message Board |
| Attach Documents in Email Notifications |
Check this box if you want set up activity message attachments for a community group. See Also: Enabling Attachments to an Activity Notification Message |
|
Tags Tab |
|
|
Group Tags |
From this screen, you can either create a new tag or select from a default list of community group tags. See Also: Assigning Tags to a Community Group. |
|
Categories Tab |
|
|
Category List |
The categories tab lists all of the categories associated with the community group. Note: If you have not defined at least one taxonomy for community groups, this tab does not appear. See Also: Creating a Taxonomy. |
| Links Tab |
Displays the group's alias if aliasing is set for community groups. You can click the alias to view the community group page. See Also: Community URL Aliasing |
5. Click Save ( ).
).
Allowing Community Group Members to Work with Folders
When you associate the CommunityDocuments or PhotoGallery server control with a community group, you can allow members of the group to add, remove, and control the sharing of folders in these controls. To allow a member to work with Photo Gallery and Workspace folders, follow these steps.
1. In the Workarea, navigate to Settings > Community Management > Community Groups.
2. Click a community group.
3. Click Edit ( ).
).
4. Place a check mark in the Allow member to manage photo/workspace folders check box.
5. Click Save ().
Viewing a Community Group’s Details
Any user with access to the Workarea can view a group’s details. However, they cannot see the members of the group.
If a user is the Group Leader (Group’s Administrator), an Administrator, or Ektron CMS400.NET User with the Community Group Administrator role, he can edit the group’s information, add and remove members, or delete the group.
See Also: Community Groups
To view a group’s details, follow these steps.
1. Click Settings > Community Management > Community Groups.
2. Click Group Name.
3. The group’s detailed information appears.
Editing a Community Group’s Information
Editing a group’s information allows you change certain details about the group. Only the Group Leader (Group’s Administrator), Administrators, Ektron CMS400.NET Users with the Community Group Admin, or Community Group Create role can edit a group’s information.
See Also: Community Groups
To edit a group’s details, follow these steps:
1. Click Settings > Community Management > Community Groups.
2. Click Group Name.
3. Click Edit ().
4. Change any fields as needed. These fields are described in Adding a Community GroupAdding a Community Group.
5. Click Save ().
Assigning Tags to a Community Group
On the Web site, Tag information for a group appears in the Group’s profile. In the Workarea, Tag information is on the View Community Group’s > Tag tab. From this tab, you can either create a new tag or select from a list of group tags.
See Also: Tags
Creating New Tags for a Community Group
To create a new tag for a community group, follow these steps.
1. In the Workarea, navigate to the Settings >Community Management > Community Group.
2. Click the community group for which to create a new tag.
3. Click Edit ().
4. Click the Tags tab.
5. Click Add Tag.
6. Add a tag to the Name text box.
7. Select a language.
8. Click Save ().
Once the Tag is saved, it appears in the Group Tags area with a check mark in the check box, which means the tag is active for the community group.
Adding a Default Tag to a Community Group
To add a default tag to a community group, follow these steps.
1. In the Workarea, navigate to the Settings > Community Management > Community Group.
2. Click the community group for which to create a new tag.
3. Click Edit().
4. Click the Tags tab.
5. Place a check mark in the tag’s check box that you want to use.
6. Click Save ().
Viewing Members of a Community Group
Only the Group Leader (Group’s Administrator), Administrators or Ektron CMS400.NET Users with the Community Group Administrator role can view members of the group. In addition to viewing community group members, you can see add and remove members. You can also accept or decline members’ requests to join the group if the group’s membership is set to Restricted.
See Also:
Adding Members to a Community Group
Removing Members from a Community Group
Accepting/Declining Requests to Join a Community Group
To view members of a community group, follow these steps:
1. Click Settings > Community Management > Community Groups.
2. Click Group Name.
3. Click View Community Group Members ( ).
).
4. A list of group members appears.
Adding Members to a Community Group
Only the Group Leader (Group’s Administrator), Administrators or Ektron CMS400.NET Users with the Community Group Administrator role can add members to a group.
See Also: Community Groups
To add members to a group, follow these steps:
1. Click Settings > Community Management > Community Groups.
2. Click Group Name.
3. Click View Community Group Members ().
4. The View Community Group Members for the group screen appears.
5. Click Add User(s) ().
6. The Add Members screen appears.
7. Using the drop down box, select the type of name for which to search.
8. Enter a name in the text box.
9. Click Search.
Note: If you leave the text box blank and click Search, all results for the name type are returned.
10. The results are returned.
11. Place a check mark in the box next to each member to add.
12. Click Add ().
13. The View Community Group Members screen appears with all members of the group.
Accepting/Declining Requests to Join a Community Group
If a group’s membership is set to Restricted (on the Community Group screen), users must request to join the group. (If membership is Open, users join a group immediately.)
In the Workarea, use the Pending tab on the View Community Group Members screen to accept or decline a user’s request to join a group.

Only a Group Administrator, Ektron CMS400.NETAdministrator, or Ektron CMS400.NET users with the Community Group Administrator role can do this.
Note: In the eIntranet, on the groups page, a special tab flags users who have requested to join a group. The administrator can click the plus sign in the top left corner to let the user join.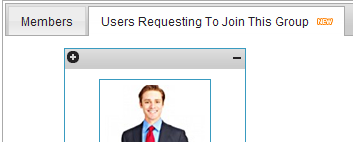
See Also: Community Groups
To accept or decline a member's request to join a group in the Workarea, follow these steps.
1. From the Ektron CMS400.NET Workarea, go to Settings > Community Management > Community Groups.
2. Click the group for which you want to accept or decline requests to join.
3. Click View Community Group Members ().
4. Click the Pending tab.
5. Check the box next to each member whose request you want to approve or decline.
To approve the request, click approve ( ).
).
To decline the request, click decline ( ).
).
Removing Members from a Community Group
Only the Group Leader (Group’s Administrator), Administrators, or Ektron CMS400.NET Users with the Community Group Administrator role can remove members from a group.
To remove members from a group, follow these steps.
1. Click Settings > Community Management > Community Groups.
2. Click Group Name.
3. Click View Community Group Members ().
4. The View Community Group Members for the group screen appears.
5. Place a check mark in the box next to members you want to remove.
6. Click Remove ().
7. A dialog box asks you to confirm the removal.
8. Click OK.
Deleting a Community Group
Only the Group Administrator, Ektron CMS400.NETAdministrators, or Ektron CMS400.NET Users with the Community Group Administrator role can delete a group.
To remove a community group, follow these steps:
1. Click Settings > Community Management > Community Groups.
2. Click Group Name.
3. Click Delete ().
4. A dialog box asks you to confirm the deletion.
5. Click OK.
Searching for a Community Group
You can search for a Community Group in the Workarea by using the Search box on the View All Community Groups page (circled below).
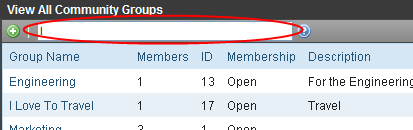
To search for Community Groups, click Settings > Community Management > Community Groups. Enter text in the search box and click <Enter>. Community Groups that match the search term appear.


![]()